Pumpkins go through various pumpkin growing stages while growing from seed to mature pumpkins.
This post is a breakdown of the major pumpkin growing stages that need your attention and a few tricks to get you to grow pumpkins successfully in your garden.
Let’s dive in!
Pumpkin Growing stages
Pumpkins are easy to grow once you know what to expect at each growing stage. By the time you are done with this study, harvesting pumpkins will be much easier.
Here are the pumpkin growing stages from the beginning.
1. Sowing the seed
You can get pumpkin seeds by saving some from a previous harvest had by you, a neighbor, or a friend. Store-bought pumpkin seeds like the sow right seeds’ small sugar pumpkin also do well in vertical gardens. For the Halloween holidays, the jack o’lantern is excellent for carving!
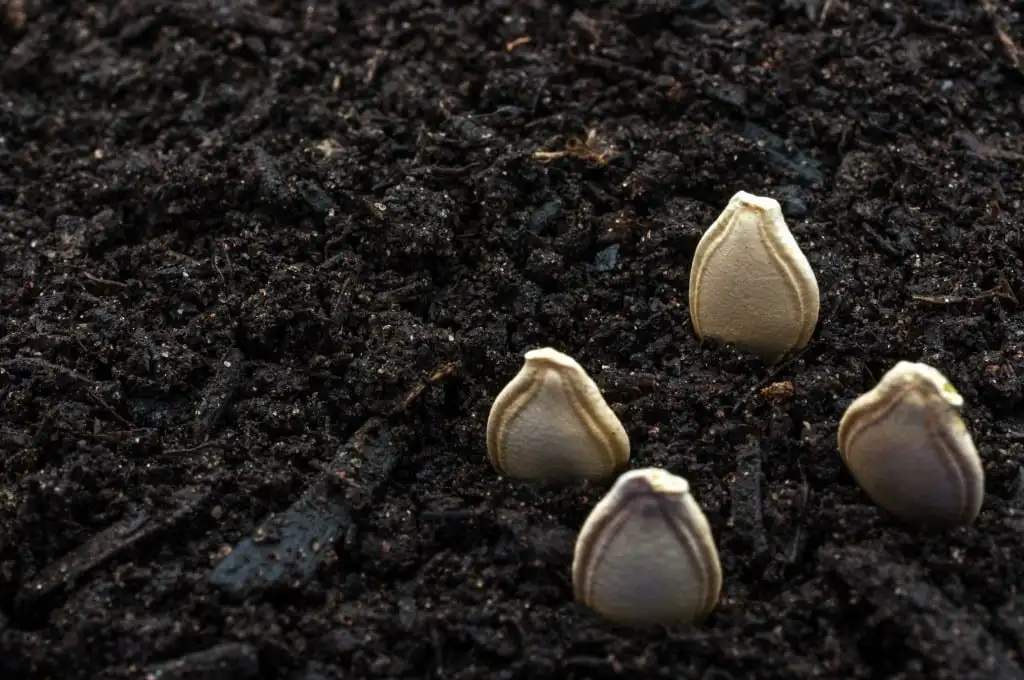
Pumpkin seeds look flattened, are oval, and have a beige color. When fresh from the fruit, they might have a slightly more orange tint.
To go through the pumpkin growing stages successfully, timing is everything. Frost is a major killer of garden plants.
To escape the frost, you can sow your pumpkin seeds indoors and transplant them later. Use a seed tray for germinating the seeds.
If the weather is too cold, place a heating mat under the seeding tray to keep the seeds warm. Only plant the pumpkin seeds directly in the garden two weeks after the last frost has disappeared.
Place each seed in the soil with the pointy side facing down. Cover the seed with about an inch of soil.
Different pumpkin varieties give different fruit sizes. Small varieties can weigh about 2 to 5 pounds per fruit. Some small pumpkin varieties are baby bear variety and small sugar, which are excellent for pies.
The largest can weigh anywhere between 50 to 100 pounds. Some large pumpkin varieties are the Cinderella pumpkin which grows quickly. They can take about 120 days to ripen. The big max, which is a variety of jumbo-sized pumpkins, can take up to 160 days to row to harvest-ready size.
For more planting success, begin planting pumpkin seeds in the middle of July in warm states. In the colder regions, begin planting in the middle of May.
2. Pumpkin Germination Stage
Germination is the second essential pumpkin growing stage to pay attention to. Seedlings are weak and can quickly die.
Pumpkin seeds can take about eight to ten days to germinate. It may take longer in cold weather or cold soil.
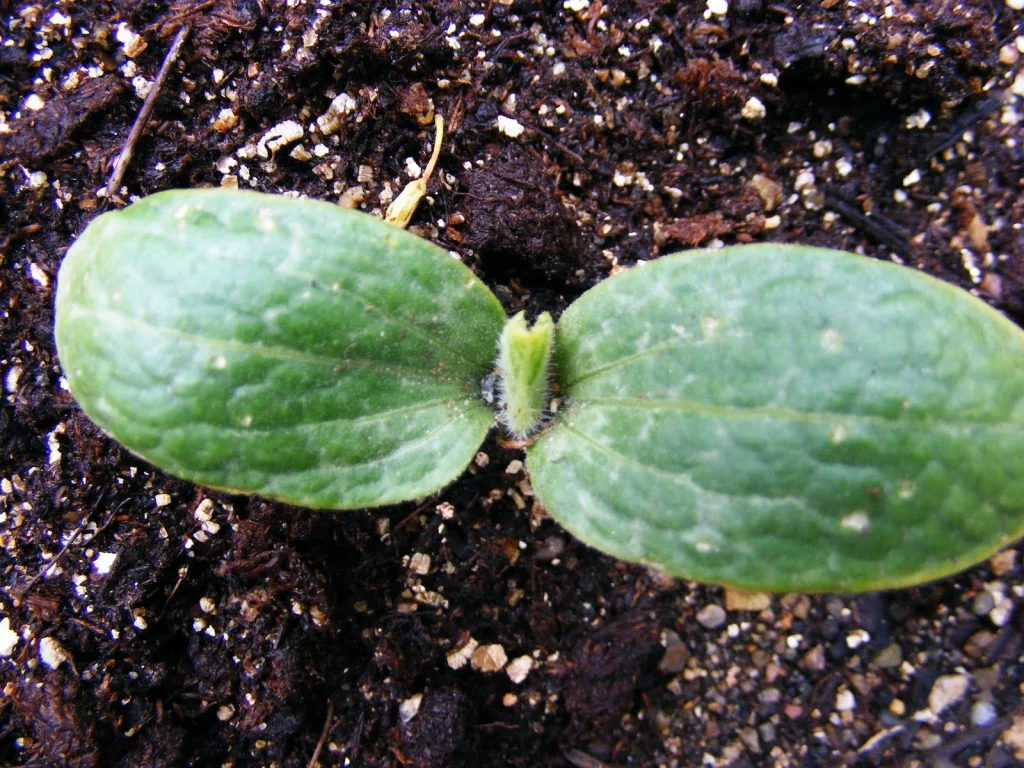
You’ll see the first leaves come out of the ground. These first leaves help the seed grow before the true pumpkin leaves appear. True pumpkin leaves appear about a week after the first leaves.
True pumpkin leaves have jagged edges and a darker green color. They do not have a smooth edge like the first leaves.
Once the leaves have sprouted, the seedling will need about 6 hours of sun each day.
If you start the seedlings indoors, you can move them outside two weeks after germination.
Using warm water for watering also helps keep the soil warm.
The leaves and stem will start to expand soon after. The pumpkin stem will begin to vine. The vine elongates, and more leave grow from it, bringing you to the vining or vegetative stage.
3. Vining Stage
During the vining stage, the pumpkin grows fast. The plant focuses all the energy and food produced to make more leaves and develop the roots.
Pumpkin plants can increase by 6 inches every day during the vining stage. A typical plant can grow to 20 feet or 6 meters.
The vines are so aggressive that they can cover your entire garden in no time. Secondary vines are the vines that grow from the main one.
You can trim secondary vines to improve air circulation to the plant and ensure all the leaves get enough sunlight. Sunlight is essential for all pumpkin growing stages and fruit development.
The leaves get more prominent at the vining stage, and the plant needs a lot of water. You need to water the plant regularly. Ensure the leaves don’t get too wet, or you might lose your pumpkin plants to diseases. A soaker hose will do this well.
4. Flowering Stage
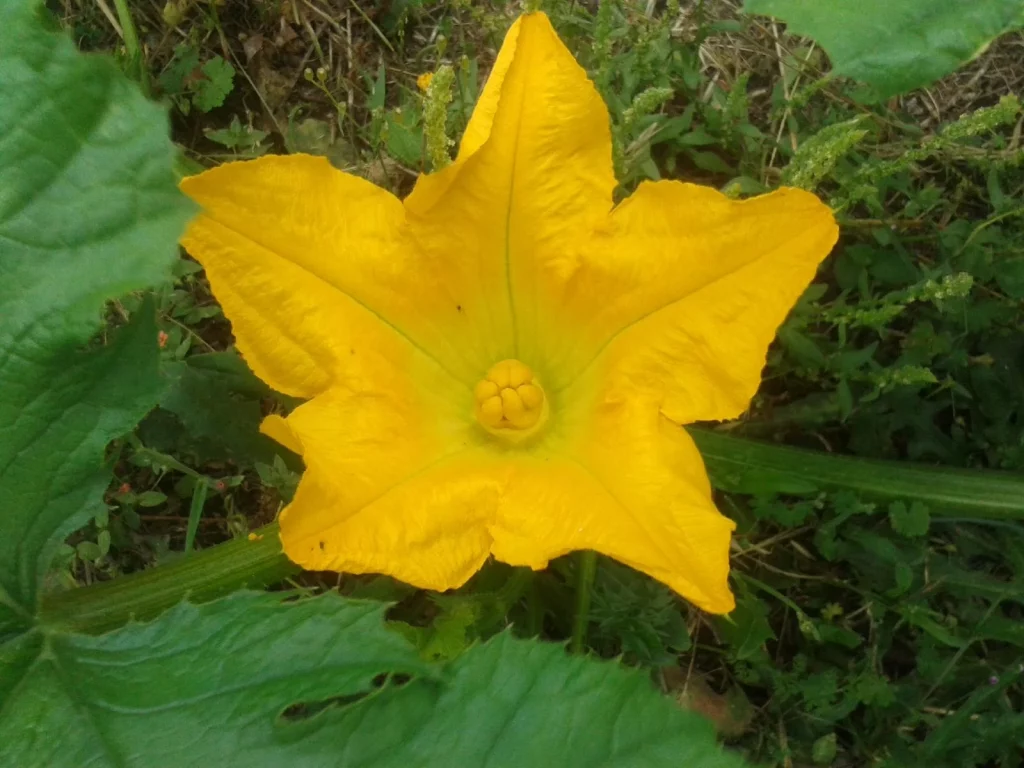
All pumpkins were once flowers! Pumpkin flowers are big and bright yellow. They also have a long stamen (which carries the pollen grains) in the middle of the flower. Their appearance is a sign that fruiting is near.
Flowering begins after 8 to 10 weeks from planting pumpkins. The male and female flowers are separate.
Male flowers appear first. They are followed by the female flowers, which appear about ten days to a few weeks after the male flowers appear.
The plant needs a lot of nutrients during the flowering stage because of fruit formation. You can begin adding some fertilizer or all-purpose water-soluble plant foods.
The male flowers produce pollen, fertilizing the female flower and growing into a fruit. The pollen grains can be carried by wind or by bees and other insects.
Honey bees pollinate by brushing against the pollen grains as they suck nectar from pumpkin flowers. The pollen stick to their bodies. When they move to the female flower, they drop the pollen and the flower is fertilized.
During very wet months, bees don’t come out to pollinate. As a result, many flowers do not form fruit. You can also hand pollinate by shaking the stem when the bees aren’t around.
After pollination and fertilization, the flower will begin to form a small pumpkin at the base (between the stalk and the base of the flower).
5. Fruiting Stage
The pumpkin forms immediately after pollination and fertilization. Flowers that weren’t fertilized successfully do not grow into fruit. The flowers shrivel up, dry, and die.
At the fruiting stage, you can see small bulbs begin to form at the base of the fertilized flowers. The plants now need lots of sunlight, water, and warm weather for the roots. They do well with temperatures of about 50 to 85 degrees Fahrenheit.
Pumpkin fruits will reach maturity 5 to 8 weeks after the fruiting stage begins. The smaller pumpkin breeds mature faster than the bigger breeds.
Water should be enough to keep the soil moist but not soaked. Soaked soil encourages diseases to spread to the pumpkin.
The young pumpkin might stay in the air because it is still light. As it gets heavy, it drops to the ground because the vine cannot support the weight.
You can add some padding between the pumpkin and the ground to prevent rotting. You can also mulch to keep the pumpkin from touching the soil.
As the fruit gets bigger, the flower falls off.
A common practice is to remove some of the flowers so that the rest of the pumpkins can grow bigger. Why? The plant can focus all its energy on a few fruits.
6. Harvesting Stage
The last but the most important pumpkin growing stage is the harvesting phase. It’s important because you get to reap the fruits of your hard work.
You know the pumpkins are ready when the vines start to turn brown, dry, and die off. The pumpkins start turning a nice orange or the color your variety shows at maturity.
The fruits ripen at different times. Pick them one by one depending on how ripe they are. Here are some of the signs that the pumpkin is ripe:
- It’s covered in waxy, dull skin that can’t be punctured with a fingernail.
- The pumpkin sounds hollow when you tap it with your hand.
- The appropriate color for the variety you planted is fully developed on the entire fruit.
- The stem feels dry and similar to a cork.
Use a sharp knife or a pair of pruning scissors to cut the pumpkin off the vine. Cut the vine at least 3 inches from the vine.
Leave the pumpkins outside or in a sunny spot of the verandah to cure. Curing will harden the skin and make the pumpkin stay longer without rotting.
7. Storage
Storage does not qualify as one of the pumpkin growing stages but it is important. Properly stored pumpkins can last up to 6 months or more.
Keep the pumpkins in a cold and dark room. Avoid piling them on top of one another to improve air circulation and prevent rotting. Keep checking for any signs of mold or rotting.


[…] Pumpkin Growing Stages That Will Need Your Attention! […]
[…] Pumpkin Growing Stages That Will Need Your Attention! […]